Wednesday, August 14, 2013

Obsession - Pretzel Rolls


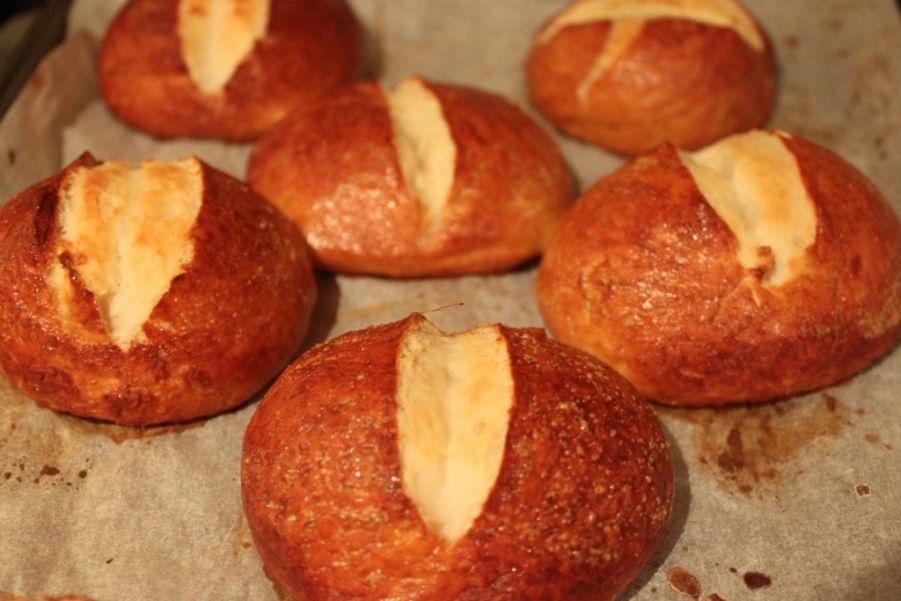
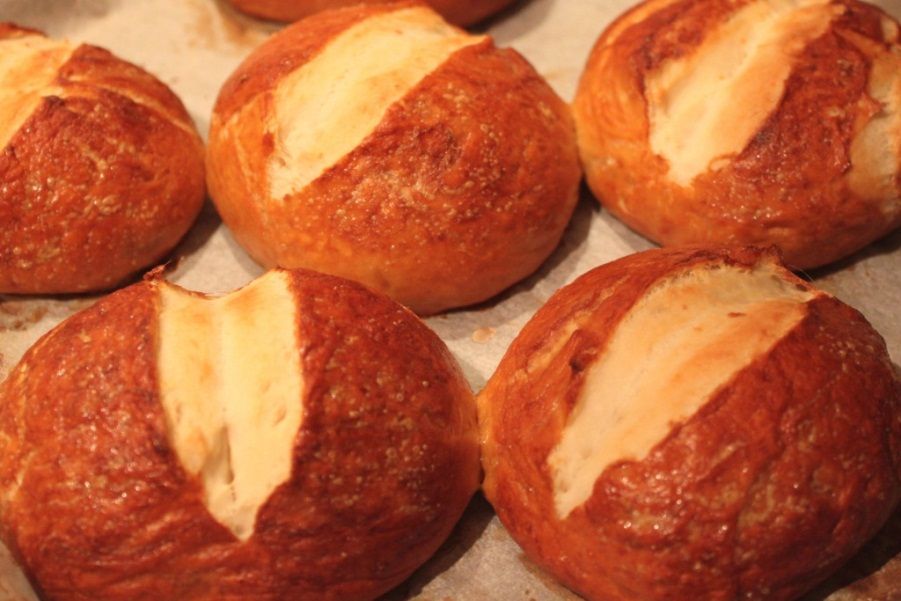
Pretzel Rolls. If you are like me and love nothing more than sitting down to freshly baked bread, still warm from the oven , smeared with butter - then these two words are going to change your life. One of the sponsors of the Sweet Escape retreat was LaBriola bakery, and they gave Alejandra (and hence us) a whole bunch of pretzel rolls. And they were good. Addictively good. Can't eat just one good. When I got home, I immediately googled recipes for pretzel rolls, needing them in my life. I've made these twice now and love them. They're not quite as good as the La Briola ones, but they are definitely an adequate at-home substitute! Both batches were gobbled up by my guests pretty quickly, so that's a fairly good indication of yumminess.

The first time I made them, I made the dough in a stand mixer that is woefully poor at actually mixing more than the small centre of the bowl where the blade sits and had to knead the rest in by hand. I can't wait til I finally get around to saving enough for a KitchenAid! The second time I made them, I used a breadmaker to mix the dough. This method worked well, but the dough ended up a bit sticky, so I needed hand-knead in some extra flour. Until I get my KitchenAid, I will be sticking with the breadmaker method, and checking earlier on to see if the dough is sticky. If you have a good stand mixer, then that will work.

As I said, these are perfect with just some butter, but also great as slider buns. Let's face it - any time you need a bun these are perfect. I realised I forgot to take a photo of them sliced up with said butter or fillings - but I was too busy eating them. Maybe next time, I'll pop it on instagram


Pretzel Rolls
adapted from here

1 1/2 cups warm water (as hot as your tap gets)
1 tbsp dry yeast
2 tsp sugar
4 1/2 cups plain flour
1 tsp salt
4 tbsp melted butter
1 beaten egg for glazing

Poaching:
8 cups water
1/4 cup bicarb soda

Start by melting the butter, and setting aside to cool slightly.

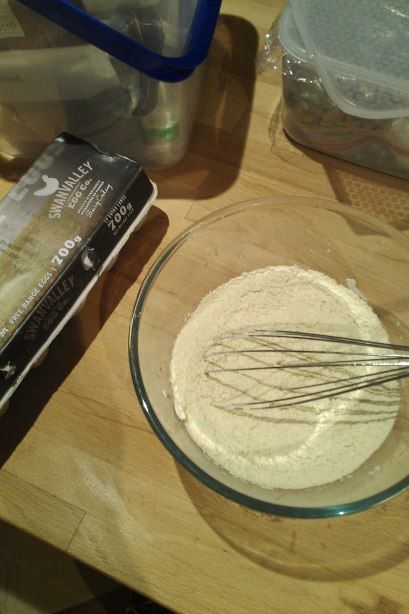
Pour the warm water, sugar and yeast into the bowl of the breadmaker, stirring together. Leave it to sit for about 10 minutes until it's foamy.

Add the flour, salt and butter, then set the breadmaker on the dough setting. Watch as it comes together, and once it's all combined (about 10 minutes into kneading for mine), gently and safely touch the dough to see if it's 'sticky' to the touch. If it is, add a tbsp of flour at a time until it's not sticky. I added an extra 4 tbsp to mine.

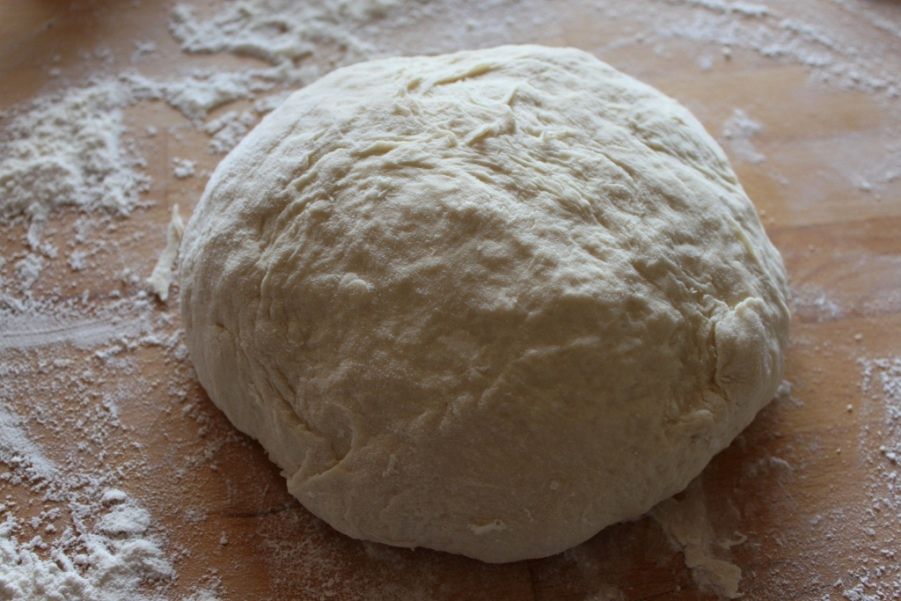
Once the dough is a good consistency, leave the dough setting to finish and it will do it's first rise in the bowl of the machine.

For standmixer, follow the breadmaker instructions as above up until the rise - it'll need around 5-10 minutes of kneading time. Then cover bowl with plastic wrap and place in a warm position for 1-2 hours until doubled in size.

Lightly flour your work surface and drop the ball of rised dough out onto it. Knead lightly into a flatter disc and cut into 16 equal pieces for slider sized buns. Take each piece and roll around in both hands, so you have a smooth ball. Place on a baking sheet lined with baking paper. Repear with all the pieces of dough, leaving room on the tray for them to rise again. Place in a warm spot 30mins to an hour. They won't quite double again, but will look puffier.

Now it's time to prepare for baking! Preheat oven to 225C. Place the water and bicarb soda into a large pot and bring to a simmer. Beat the egg for the glaze.

Carefully slide each roll "flat" side down into the poaching water, let it sit for 30 seconds, flip it over and let it sit "round" side in the water for another 30 seconds. Flip it back over and fish it out with a slotted spoon and pop it back on the baking sheet, flat side down.

Brush each poached roll with the egg wash and slash a deepish line across the middle with a knife (if desired, you can sprinkle salt on top, too).

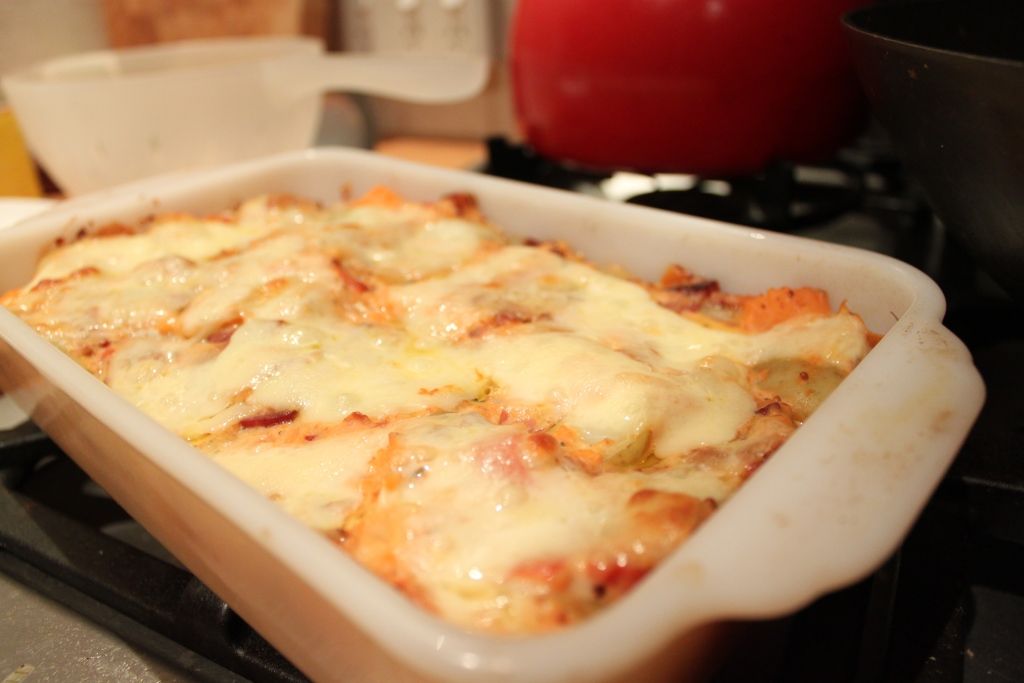
Bake the rolls in the oven for 15-20 minutes, rotating trays half-way through, so the rolls are an even golden brown and sound hollow when you tap the base. Allow to cool slightly before eating. Best served warm!


Friday, August 9, 2013

Entertaining - 30 Sucks Party

I had all sorts of good intentions of cooking something awesome this week AND taking proper photos of it. I really, really want to get better at doing that and stop using phone photos. But I also want to maintain a vaguely weekly post on this blog. Seeing as this whole week has been a blur of after work activity, full of bottom-of-the-fridge soup, baked beans and toasted cheese sandwiches - no real cooking for real photos eventuated. So I thought I'd do a post on a party my husband and I threw. We absolutely love entertaining and having people over, so I thought I'd add a few posts of our past parties to maybe inspire you when I don't have any recipe photos lined up. I thought I'd start with a party we threw for a friend almost exactly a year ago. Maybe you can use some of the details in a party of your own!


Last year, a whole bunch of my usual crew turned 30. And all over pinterest were photos of "30 Sucks" lollipop bouquets. Seriously, how did it know? Did the whole world turn 30 last year?? Seeing this, and having had many a Buffy conversation over the years with the birthday boy - the theme was born...30 Sucks. Double-meaninged "sucks". Perfect, right? Theme chosen, we got to work.


Front of the invitation
And when you open it up...
We were lucky enough that after the theme was picked, the party supply shop down the road were having a chuck-out sale of all their old Halloween stuff, in preparation for new stock. We were able to turn our games room into a haunted castle without a huge expense. I then made blood-rimmed wine glasses and little coffin treat boxes (complete with lollipop 'skeleton'). I also made jelly worms and labelled reddish juices as various blood types to go with the usual party fare.


We played vampire themed versions of normal kids party games. I love playing games at parties - even as an adult. I don't think it's nearly encouraged enough, except for at Kitchen Teas! Our games were "Pin the Bite Mark to the Victim", "Suck it til it Fits", "Pass the Suspicious Looking Parcel" and a version of musical statues, using horror poses as the "freeze".


A friend who couldn't make it came as a staked vampire!

And when it was time to make the cake, I went to my favourite go-to cupcakes - red velvet. Delicious and the colours suited the theme.


If you want any more details about any of this party, send me an email!

Tuesday, July 30, 2013

You Only Get One - Mexican Hot Chocolate Snickerdoodles

These are my husband's favourite biscuits. We both love the choc/chilli combination, so when I came across this recipe a few year's back on MlovesM blog, I gave it a go almost immediately. From first bite, my husband was obsessed. I've told you before that he takes biscuits to work for lunch - well, this is the biscuit that started it. He would call me from work and claim I hadn't given him any, because he'd eaten them all before lunch time. He would tell everyone that would listen that these were the most amazing biscuit in the entire world, that you'd have one and just constantly want more. That he was torn, between wanting the wholed world to taste them, but wanting to keep them all for himself. So he came up with a compromise - you only get one.

Just before he'd give someone one of these biscuits he'd tell them he was going to give them the best biscuit ever, but you only get one. You will only ever get one. And that's all they ever got. So, if you want more than that, you'd best make them yourself.

These are best baked just until cracking point, that way when they cool, they are slightly fudgy on the inside and crisp on the outside. My husband told me to point out that these biscuits are also one of the few he's ever eaten that are best eaten cold, not warm from the oven. This last batch I made with spelt flour, to increase the nutritional value. I haven't used spelt much before, but have read that you need to be a bit more careful with it, so when mixing the wet and dry, do it gently and stop as soon as it's completely mixed. Taste, texture and cooking-wise, they were identical.

As a disclaimer, I don't necessarily think these are the *best* biscuit in the entire world, but they are in my husband's world and they are pretty delicious!


Mexican Hot Chocolate Snickerdoodles
(makes about 24)
1 and 2/3 cups spelt flour
1/2 cup cocoa powder (I use Cadbury Bournville Cocoa)
1 tsp bicarb soda
1/2 tsp cinnamon
1/2 tsp cayenne pepper
1/4 tsp salt
1/2 cup grapeseed (or other neutral) oil
1 cup white sugar
1/4 cup pure maple sugar
3 tbsp milk
2 tsp vanilla

Sugar coating
1/3 cup white sugar
1 tsp cinnamon

Preheat oven to 170C

Whisk together flour, cocoa powder, bicarb soda, cinnamon, cayenne and salt.

In another bowl, whisk together oil, sugar, maple syrup, milk and vanilla. Pour this mixture into the dry ingredients, stirring gently with a wooden spoon until just combined.

In a small plastic container or jar with a lid, combine the cinnamon and sugar and shake to combine. Your biscuits will be dunked in this, so if you can't use it straight from the container, spread it back out in a shallow dish. I always have a container of cinnamon sugar ready for making these snickerdoodles!

Roll dough into small balls, then gently flatten into discs around the size of the biscuits you want. Gently push one side of the disc into sugar coating. Then place sugar side up onto lined baking trays. They spread a little, so give them room.

Bake until the cookies have spread and are crackly on top, around 9-12 minutes. Cool, then eat!


These also make amazing ice cream sandwiches!

Thursday, July 25, 2013

Inventing - Chick Pea Pancakes


Have you ever had that amazing feeling of thinking of something awesome for the first time? You feel like you've made this immense world-changing discovery because for you, it wasn't there, then you thought of it and it was. I've gotten it a few times in my lifetime. Sometimes for almost child-like discoveries of working out how something works without being shown. Sometimes for thinking of a novel way of using an ordinary household item. And sometimes for inventing recipes that blow my mind.

I know the I wouldn't be the first person to make these. I know that they possibly even exist as a traditional dish that's been around for generations. I also know that I invented them. In my world, anyway. In a food-related email discussion (I have a lot of those. A lot), we were talking about chick pea fritters and their awesomeness when I had a lightbulb moment. Chick pea pancakes. Savoury pancakes are already awesome, how about I make them with chick pea flour? I already had a Moroccan stew in the slow cooker that was requiring some form of side when I got home. What would be better than chick pea pancakes to dip in the saucy deliciousness? Armed with just this thought and an off-by-heart pancake recipe (more pikelet than crepe). I thought I would try it for the first time almost identically, minus sugar. I ramped up the baking powder and bicarb to ensure fluffiness with the new flour and voila. They were good. Really good.

This is pretty much going to be my go-to 'bread' recipe for all Middle Eastern and Indian dishes I make from now on, I'd say. My husband says they are like a cross between a pappadum and a paratha. So whilst it's probably not a new dish out there in the big wide world - I invented these. 100% from idea to finished product. And I'm pretty darned proud!


Chick Pea Pancakes
serves 4 as a side
1 cup chick pea flour
1 tsp baking powder
1 tsp bicarb
1/4 tsp salt
1 large egg, lightly beaten
1/2  cup water
1 tbsp butter (I actually use olive oil spread)
More butter/spread for frying

Whisk chick pea flour, baking powder, bicarb and salt together to fully combine.

Make a well in the middle of the dry ingredients and add the egg and water, whisk until a smooth batter is obtained.

Melt the butter in a fry pan on a low heat. Pour this into the batter whilst whisking and make sure it is fully incorporated.

Put the pan back on the heat and a minute or so later, pour the batter into the pan for making pancakes to your desired size. The first time I made big ones, the next time I made pikelet size ones.

Fry until bubbles start forming on the surface, around 3 minutes. Then flip over and cook for another 1-2 minutes or lightly golden on the other side.

Store on a plate in a really low oven to stay warm as you repeat the process until all cooked.

Sunday, July 21, 2013

Joining Bloglovin

So, a reader requested that I join bloglovin so she could keep up-to-date with my posts now that google reader doesn't work. I'm so not with it, in the world of social media these days! But I will, so that people who want to can keep seeing and reading my blog. Apparently that means adding this line, to show that I am me!

<a href="http://www.bloglovin.com/blog/9942659/?claim=n7twjrqhdxx">Follow my blog with Bloglovin</a>

I hope this helps everyone :)

Jenn xx

Summer dreaming - the Lychaloechee


When I got up this morning, there was ice on my windscreen and a bitter chill in the air. It was minus 0.6C. Two weeks ago, I was enjoying days in the low 30's. Now, well, now it's cold. Meanwhile, my newsfeeds on blogger and pinterest and instagram are full of fruity cocktails and balmy summer nights. So whilst I don't have the fresh watermelon or mango or berries to whip up a delicious summer cocktail, I thought I would console myself a little bit with the first cocktail I ever created - the Lychaloechee.

Being in New York, I really took to all the readily available and amazing Latin restaurants about. We don't have a great deal of Latin cuisine in Perth, although there was somewhat of a Mexican food revolution of late which I heartily support! But something we do have lots of here due to our proximity is good Asian food and good Asian grocers. One of my favourite things to have discovered back in my uni days was Aloe Vera juice. This is now readily available in most supermarkets. It's a sweet, still juice with little floaty bits of goodness in it. I usually get the plain one, but it also comes flavoured or sweetened with honey.

When my husband and I first moved in together, I introduced him to one of my favourite summer fruits - the lychee. Seriously love those little fellas! The texture and sweetness and flavour is just sensational. And in turn, he excitedly brought home a present a short time later - a bottle of Paraiso lychee liqueur. I sampled it by itself and immediately knew what it needed. It's like I could already taste it - aloe juice. I was making a margarita pie at the time, so I had an abundance of limes which would make the perfect kick through the sweetness.

I've experimented with different versions of this, adding a white rum to ramp up to booziness (the liqueur is weak in strength, strong in flavour) or soda water for a bit of spritzy freshness, but I always go back to the original. The tropical lychee and aloe flavour combination is remiscent of summer, and in this presentation, drinkable in winter!

So tonight, I sit in front of the heater, ugg boots on, and sip my Lychaloechee and dream of the balmy nights ahead! Cheers!


Lychaloechee
1 part Paraiso (or other lychee liqueur)
5 parts aloe vera juice
wheel of lime

Pour the Paraiso and aloe vera juice into a high ball glass, stir well to mix
Lightly squeeze the lime wheels into the glass, then drop in as a garnish


Sunday, May 26, 2013

One Dish, Two Ways - Italian Potato Salad/Italian Potato Bake

My cousin is about to head off on a European adventure, and seeing as she will be away for her birthday, she decided to have a bit of a get together before she went. I offered to bring a dish and was told maybe a potato salad. The rest of the food being served was going to be Italian, which got me thinking. Italian Potato Salad? Does such a thing exist? I've never eaten a potato salad made with Italian flavours - sounds like experiment time!

I guess I should say up front, that I've never been the hugest fan of potato salad. I think because a lot that I've eaten have had a really strong, overly 'mayonnaise-y' ness to them, and not a lot of content beyond boiled potatoes and peas. And boiled potatoes are one of the blandest foods in the world. I like to pimp mine out a bit more. 

The previous night I had fried up some hot salami with slices of garlic for a different dish and thought that was the perfect start for Italian Potato Salad. I didn't have enough potato to make a salad large enough to share, so I added some sweet potato to the mix. And I had an abundance of red capsicums, so I roasted up a few to add a lovely sweetness and new texture to the mix. The sauce was made simply with greek yoghurt, dried oregano, sun dried tomatoes and seeded mustard. The result was pretty darn impressive. Something I would eat a whole plate of as a meal.

Unfortunately (but luckily for me), it was forgotten in the fridge at the party, and I got to take it home with me. Being a cold night, and my husband hoping for a hot dinner asked - could it be heated? Well...yes. The sauce is just greek yoghurt. I don't see why not! I poured the whole thing into an oven dish, added some thinly sliced Provolone cheese and baked it for 20 minutes until warmed through and the cheese was golden. Heaven!

So here's a dinner perfect two ways - Italian Potato Salad and Italian Potato Bake. (I forgot to take photos of it until it was out of the oven. Sorry!)


Italian Potato Salad/Bake
6 baby potatoes, quartered
2 small sweet potatoes, cut to similar size
2 small red capsicum
half hot salami sausage, thinly diced
2 large cloves garlic, sliced
300g Greek Yoghurt
1/2 teaspoon dried oregano
1/2 teaspoon smoked paprika
5 sun-dried tomatoes
2 teaspoons whole-seed mustard

Put the potatoes into a pot of water and bring to the boil. Once boiling, add the sweet potato. When potatoes are tender, but not completely soft, strain out water and rinse with cold water to stop cooking. Store in fresh cold water until ready to assemble.

Meanwhile, roast the capsicums in a hot oven until the skin starts blistering. Place in a bowl and cover with plastic wrap to sweat a few minutes so you can peel the skin off. Discard innards and slice into strips. Set aside to cool.

Fry the salami in a medium hot pan, once starting to crispen and release oils, add the garlic slices and cook until everything is toasty. Drain really well on paper towels.

To make the sauce, blend the greek yoghurt, oregano, paprika and sundried tomatoes in a food processor or blender until well mixed and the tomatoes are chopped. Add the mustard and pulse a few times to distribute.

Combine all of the ingredients and add the sauce a bit at a time to ensure it's not too saucy. I ended up with too much sauce. Serve as potato salad.

To make the bake:
Heat oven to 180c
Pour potato salad into a casserole dish, add Provolone slices or thinly sliced/grated cheese of choice over the top and bake for 20 minutes or so until cheese is toasty and the sauce bubbles slightly add the edges.

This photo is of it served to the rear with a super-quick seafood marinara pasta I cooked while the potato salad became a potato bake!